
Why this task is easy to ignore
Most homeowners clean the lint trap regularly because it is visible and accessible. The duct behind the dryer is out of sight, so the problem it develops is also out of mind. Lint does not accumulate all at once. It builds up gradually, cycle by cycle, until airflow is seriously restricted.
According to the U.S. Fire Administration, failure to clean the dryer is the leading cause of residential dryer fires. The fires are not random equipment failures; they follow a predictable pattern of neglect. That makes this one of the more preventable hazards in a home.
Because the dryer still runs even when partially blocked, many households do not realize anything is wrong until drying times grow noticeably longer. By that point, the duct may already pose a real risk. See the full list of commonly skipped maintenance areas for other tasks that follow a similar pattern.
How lint blockages develop
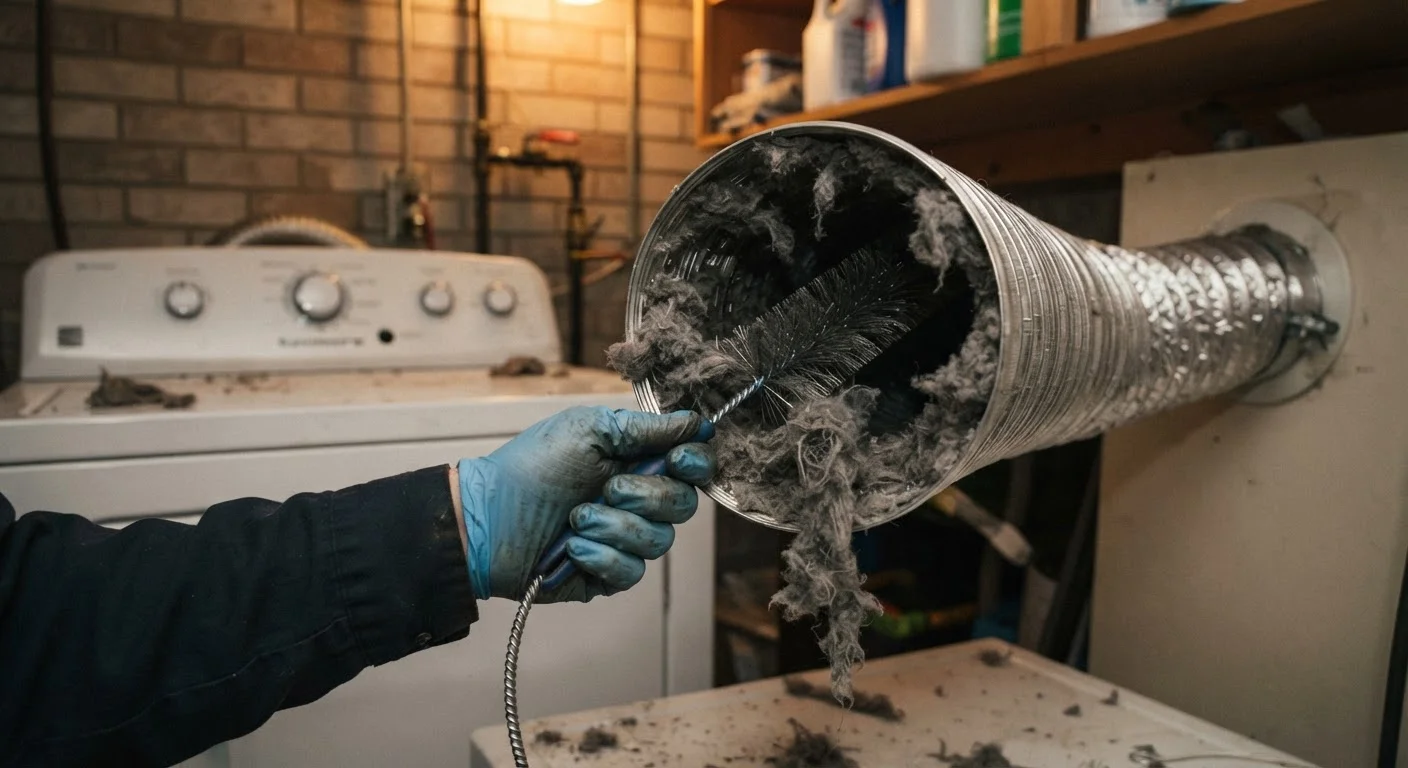
Every load of laundry sheds fibers. The lint trap in your dryer catches a large share, but fine particles still travel with the exhaust air into the duct. Those particles stick to the interior walls, especially in areas where the duct bends or transitions. Over months and years, the layer thickens.
The problem worsens with certain habits. Drying heavy fabrics like towels and fleece produces more lint than lighter loads. A duct that runs a long distance or has several bends gives lint more surface area to cling to. And flexible foil duct, with its corrugated interior, catches significantly more lint than smooth rigid metal pipe.
Heat and restricted airflow are the combination that creates a fire hazard. As the duct narrows, the dryer's internal temperature rises. Lint is highly flammable. When conditions are right, the lint inside the duct can ignite and spread fire through the wall cavity before a smoke detector has a chance to respond. For a broader look at how home safety devices work together, the home safety devices audit covers smoke detectors and fire extinguishers in practical detail.
Check the exterior cap every season
Walk outside and look at where your dryer vent exits the house. The flap should open when the dryer runs and close fully when it stops. A stuck or missing flap allows moisture, pests, and cold air into the duct year-round. Cleaning this cap takes a few minutes and is easy to do while the dryer is running so you can confirm airflow.
How to clean the vent yourself
For a straightforward duct run, you need a dryer vent brush kit. These kits include a long flexible rod with a brush head and usually attach to a power drill. Before starting, unplug the dryer and disconnect the gas line if you have a gas model. Consult a licensed professional if you are not confident working with gas connections.
- Pull the dryer away from the wall and disconnect the duct from the exhaust port on the back of the dryer.
- Go outside and remove the exterior vent cap. Check that the flap opens freely and that no nesting material is blocking it.
- Insert the brush from the exterior opening and work it through the duct in sections, adding rod extensions as needed.
- Vacuum the loose lint from both the dryer's exhaust port and the disconnected duct section closest to the dryer.
- Reconnect the duct and vent cap securely before pushing the dryer back into place.
If your duct runs through several bends, travels more than 25 feet, or is partially behind a finished wall, hire a professional duct-cleaning service instead of attempting it yourself. Forcing a brush through a kinked or inaccessible run can damage the duct and create a new problem.
When to call a professional
Not every dryer vent situation is a weekend DIY job. A professional service uses a high-powered vacuum combined with rotary brushes, which clears debris more thoroughly than a hand-operated kit. This is worth considering if your duct has not been cleaned in several years, if drying times remain long after a basic cleaning, or if you cannot locate where the duct exits the house.
Professional cleaning typically takes under an hour and gives you a clear picture of the duct's condition, including whether any sections are kinked, disconnected inside a wall, or made of plastic pipe that does not meet current code. If the service finds that your duct needs replacement, that work generally requires a permit and should be done by a licensed contractor. Check your local building department for requirements in your area.
Keeping up with this and similar tasks does not have to be expensive. The home maintenance budget guide explains how to rank preventive tasks by cost and risk so that nothing critical slips through.