
Understanding the light and soil under your trees
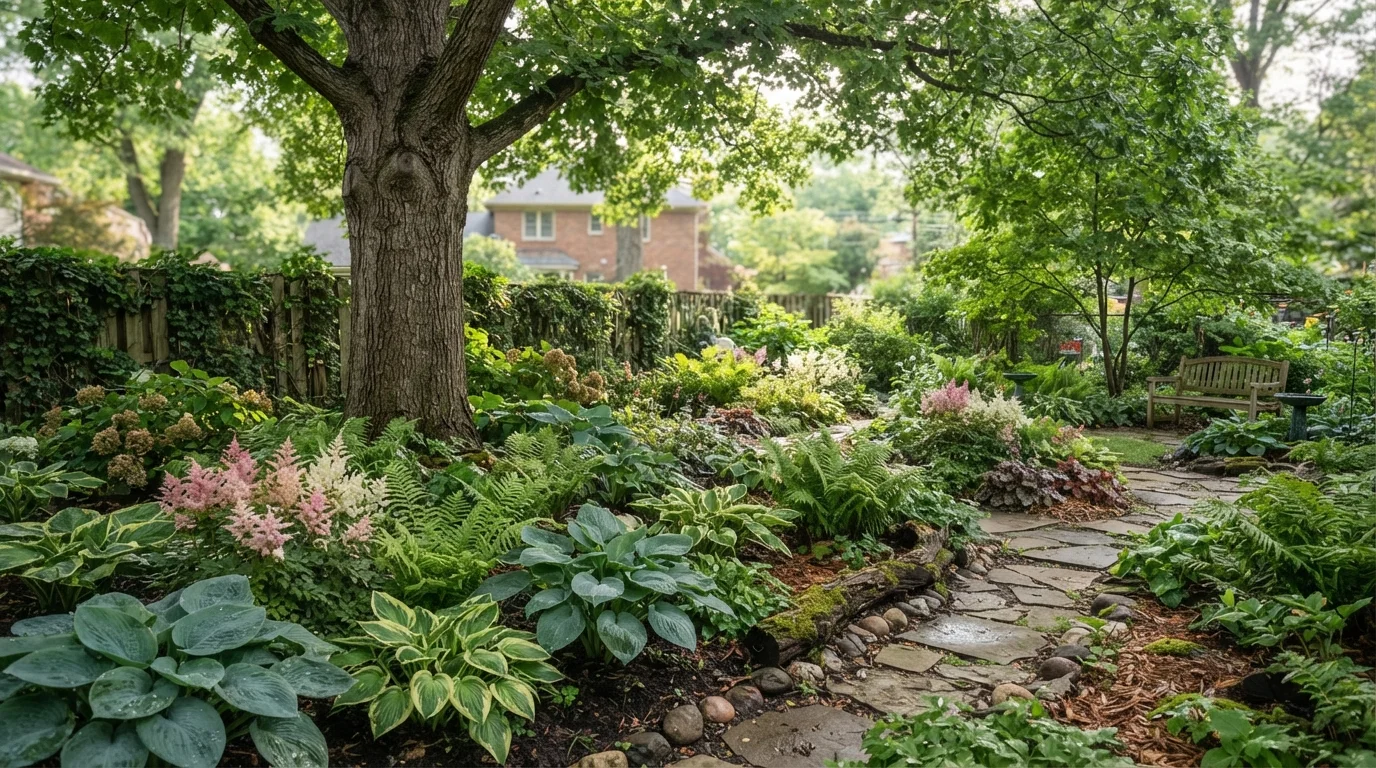
Before you plant anything, spend time observing how much light actually reaches the ground beneath your trees. Shade falls into three general categories that gardeners use to match plants to conditions:
- Dappled shade: shifting patches of sun throughout the day, common under trees with open canopies such as birch or honey locust
- Partial shade: two to four hours of direct sun, typically in the morning or late afternoon
- Deep shade: fewer than two hours of direct sun, found under dense evergreens or tightly spaced mature trees
Most shade-tolerant plants grow in dappled or partial shade. Deep shade is harder to work with, but a few groundcovers such as pachysandra and sweet woodruff can fill it in over time.
Soil is the other variable. Tree roots pull moisture and nutrients from the surrounding ground, leaving the soil beneath the canopy dry and sometimes compacted. Scrape away a small amount of surface soil to check: if you hit dense roots within a few inches, you will need to plant between root zones rather than trying to dig through them. Adding a 2-inch layer of compost on top of the soil (rather than tilling it in) improves moisture retention and slowly feeds the area without cutting roots.
If you are considering low-maintenance plants that also support local wildlife, see our guide to native plants for American gardens for shade-tolerant species native to your region.
Choosing the right plants
Plant selection is where shade gardens succeed or fail. Avoid trying to force sun-loving plants like petunias or salvia into a shaded bed. Instead, work with species that genuinely prefer lower light.
Foliage plants
Hostas are the most adaptable shade plants available. They come in dozens of sizes and leaf colors, tolerate dry shade reasonably well once established, and return year after year. Ferns, including the ostrich fern and Christmas fern, add texture and stay green from spring through frost in most climates.
Flowering perennials
Astilbe produces feathery plumes in white, pink, and red and prefers consistent moisture, making it well-suited to the shadier edges of rain gardens or low spots. Coral bells (Heuchera) offer both interesting leaf color and small bell-shaped flowers, and they handle a range of shade conditions. Bleeding heart (Lamprocapnos spectabilis) blooms in spring before tree canopies fill in, then goes dormant in summer without causing any gap if you plant hostas nearby to fill that space.
Groundcovers
For areas where you want low, spreading coverage, consider creeping phlox in partial shade, or native wild ginger for denser conditions. Pachysandra spreads steadily but can become aggressive: give it a defined edge to contain it. Bugleweed (Ajuga) tolerates foot traffic and spreads quickly, though it also needs edging to keep it from migrating into the lawn.
If your yard also includes sunny, dry sections, the drought-tolerant landscaping ideas article covers plant and design options suited to those contrasting conditions.
Match plant size to the space
Shade plants vary widely in their mature size. A hosta labeled 'giant' can spread 4 feet or more across, while miniature varieties stay under 12 inches. Check the mature spread on the plant tag before buying, and leave adequate space between plants from the start. Crowded plants in shade are more prone to fungal problems because air circulation is already reduced under a tree canopy.
How to plant a shade garden step by step
Follow these steps once you have assessed your light conditions and chosen your plants.
Map out the planting area
Use a garden hose or rope to outline the bed shape. Irregular, curved edges look more natural under trees than straight lines. Mark how much of the area gets dappled light versus deeper shade so you can assign plants to the right spots within the bed.
Prepare the soil without damaging roots
Do not till or deeply dig the bed. Instead, remove grass or weeds by hand or with a flat spade, cutting only a few inches down. Spread 2 inches of compost over the surface. This feeds soil organisms and improves moisture retention over time as it breaks down.
Plant in groupings rather than rows
Group three to five plants of the same variety together for a natural look. Space plants according to their mature spread, not their current size. In the first year the bed will look sparse, but overcrowding creates disease problems and forces you to divide plants sooner than needed.
Water thoroughly at planting time
Water each plant deeply immediately after planting. This settles the soil around the roots and removes air pockets. In the first four to six weeks, check soil moisture two to three times a week and water when the top inch feels dry. After the first season, most shade perennials need watering only during dry spells.
Apply mulch and set a maintenance routine
Spread 2 to 3 inches of shredded bark or wood chip mulch over the bed. Keep mulch away from plant crowns and tree trunks to prevent rot. Plan to refresh the mulch layer each spring as it breaks down. Once a year in early spring, apply a light top-dressing of compost to maintain soil quality.
After planting, apply a 2- to 3-inch layer of shredded bark mulch over the entire bed, keeping mulch a few inches away from plant stems and tree trunks. Mulch holds moisture, moderates soil temperature, and reduces weeds. Check out our watering schedule guide for general guidance on how often to water newly planted beds through the season.
Come fall, avoid cutting back most shade perennials until spring. Leaving foliage in place over winter protects the root zone and provides habitat. The fall yard prep checklist covers what to clean up and what to leave alone as the season closes.